REVIEW · CEBU CITY
Cebu: Adventure Hiking Trip in the City
Book on GetYourGuide →Operated by Buscas Outdoor Leisure Service · Bookable on GetYourGuide
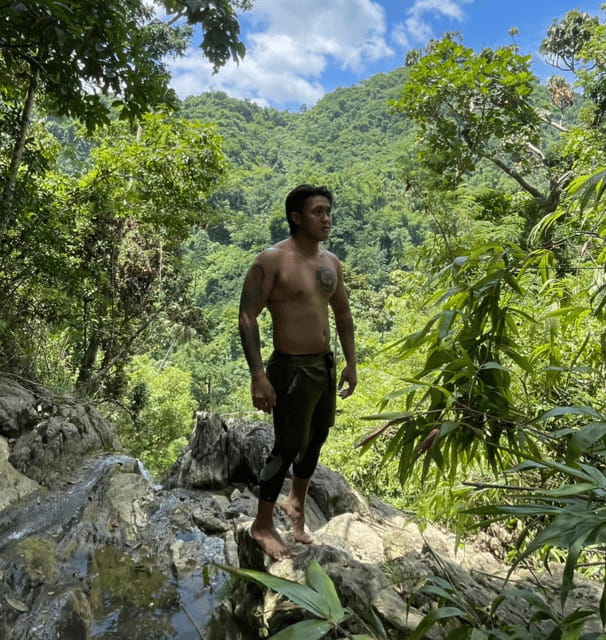
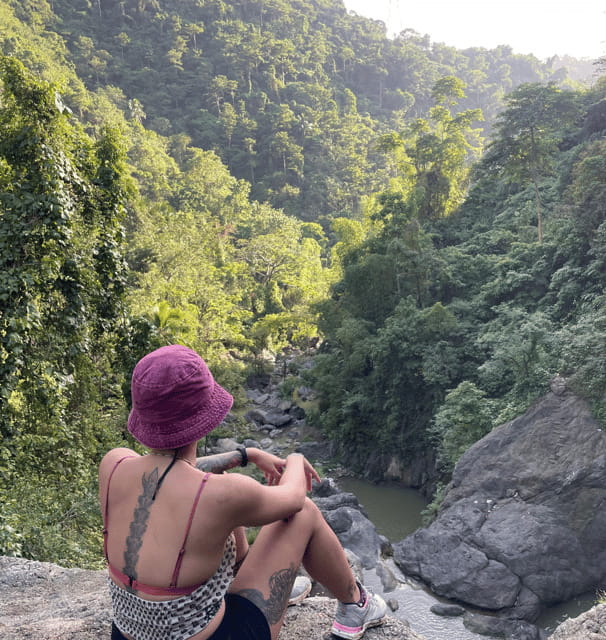
Cebu City, but suddenly it feels wild. This 5-hour adventure hike turns a normal morning in Talamban into a mix of waterfalls, river rocks, and a 180° panorama from the Kang-irag area—without you hauling across the province. I like the simple fact that you don’t need to travel far, and you still get proper “outdoorsy” moments right in the Cebu landscape.
Just be realistic about the trail. Mt. Kang-irag includes steep sections and some bouldering/scrambling, so it’s not built for complete beginners or anyone who wants an easy stroll. If you’re fit enough to handle uneven footing and short, punchy climbing moves, you’ll likely find the challenge fun.
In This Review
- Why This Cebu Hike Works: City Access + Real Mountain Feel
- The 5-Hour Route, Step by Step (and What Each Stop Feels Like)
- Starting at Gaisano Grand – Talamban (Find Jollibee)
- Scooter to Barangay Budlaan
- Budla-an Barangay Hall Safety Briefing (About the Trail, Not Just Rules)
- Budlaan Falls: Photos, Guided Views, and a Possible Swim
- Mt. Kang-irag Campsite, Sirao: Break, Photos, and Sunset Views
- Busay Walk + Scooter to the Finish
- The Real Difficulty Level: Who Should Go (and Who Should Not)
- Getting the Most Out of Guides Like Chris, Christian, and Jay
- Value Check: Is $52 Worth It for a City Mountain Adventure?
- What to Bring (So You Don’t Regret It at Step 1)
- Timing Tips: When to Go and How to Plan Your Morning
- Who Should Book This Hike in Cebu City?
- Should You Book Mt. Kang-irag + Budlaan Falls?
- FAQ
- FAQ
- How long is the Cebu Adventure Hiking Trip?
- Where is the meeting point?
- What does the itinerary include?
- Is swimming included?
- Is this hike suitable for beginners?
- What languages are the guides?
- What should I bring?
- Who should not join this activity?
- What about cancellation or paying later?
Why This Cebu Hike Works: City Access + Real Mountain Feel
The best part of this hike is how little planning you need before you’re on dirt paths and hearing the sound of water nearby. You start in Talamban at Gaisano Grand, then move by scooter to the Barangay Budlaan area where the hike begins in earnest. That short transfer matters: you get more hiking time and less “getting there” time.
What you’re really paying for is a full mini-adventure arc:
- Budlaan Falls for photos and a cooling break
- Mt. Kang-irag for the physical part
- Kang-irag Campsite (Sirao) for the payoff: a wide 180-degree view of Cebu
On the guide side, I also like that the tour is run by experienced locals who can adapt to your pacing. In the past, guides like Chris, Christian, and Jay were described as friendly, safety-aware, and willing to adjust routes to ability. You’re not just being walked from A to B—you’re being guided through the terrain.
One more practical point: it’s a hike with real obstacles. One participant noted that safety gear was not provided. That’s not the normal expectation you should rely on, so before you start, ask what safety measures they’ll have on the rough scrambles (especially if you’re less comfortable with rock steps).
The 5-Hour Route, Step by Step (and What Each Stop Feels Like)

This is a timed outing, but it’s paced to your ability. Here’s the flow, and why it’s set up this way.
You can also read our reviews of more city tours in Cebu City


Starting at Gaisano Grand – Talamban (Find Jollibee)
Your meeting point is inside Gaisano Grand Talamban, at Jollibee. If you’re using a map, the coordinates are 10.36601448059082, 123.91373443603516.
Why this matters: you don’t have to decipher a remote trailhead. You start in a real, normal place—then you’re off on scooters to the hiking zone.
Scooter to Barangay Budlaan
You’ll take a scooter transfer for about 20 minutes, followed by a quick setup period at the barangay hall area. Expect:
- ~10 minutes for a safety briefing
This briefing is important because the mountain portion isn’t just flat trekking. The route includes steep climbs and parts that can involve bouldering and scrambling. Even if you’ve hiked before, this isn’t the kind of trail where you can pretend your shoes are optional.
Budla-an Barangay Hall Safety Briefing (About the Trail, Not Just Rules)
This is where you should learn what the guide expects from you, how steep sections are handled, and how you should move on uneven ground.
Given the trail difficulty, I’d treat this briefing like it’s the most important part of the day. If you have any concerns—balance, knee issues, fear of heights—bring them up here so your guide can adjust the plan.
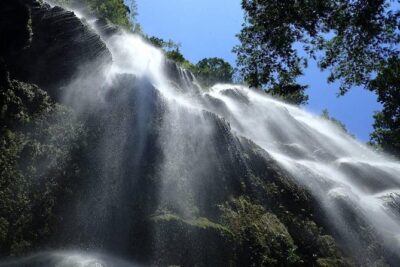
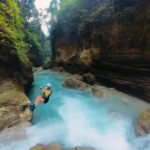
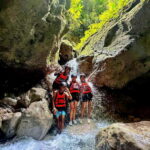
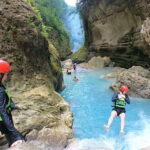
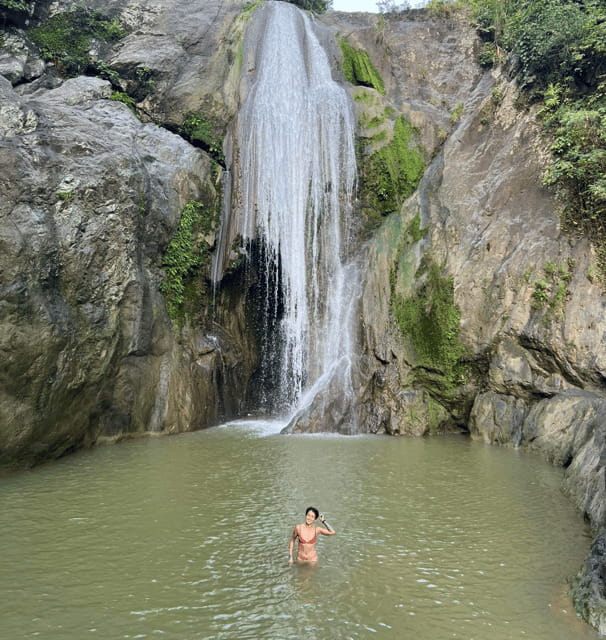
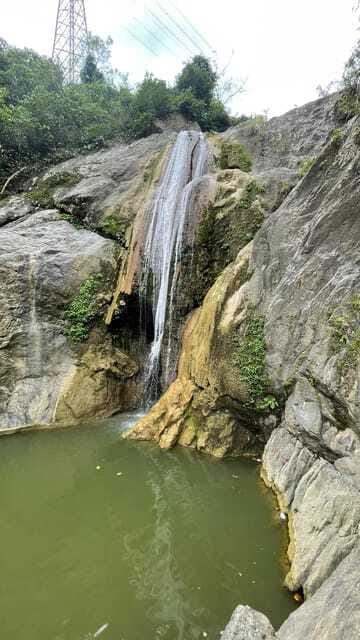
Budlaan Falls: Photos, Guided Views, and a Possible Swim
Then the hike hits the cool reward zone: Budlaan Falls. You’ll have about 1.5 hours here, with:
- a guided look at the waterfall area
- photo stops
- sightseeing on the way
- free time to relax
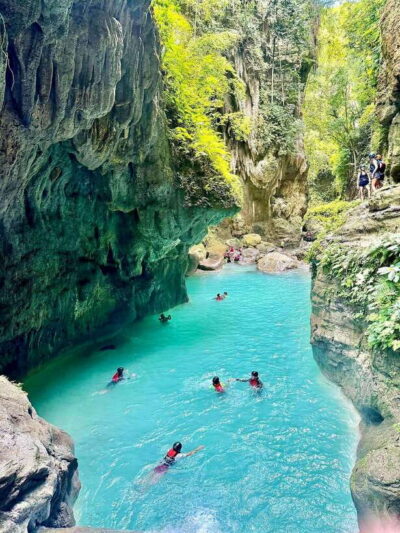
The falls area is also where the hike turns from “hike” into “adventure.” The route can include scrambles around the water. If conditions allow, you get an optional chance to swim in the cool, clear waters.
Practical tip: even if you plan to swim, bring the same sensible hiking habits. Wet rocks can turn a safe step into a slide. Wear footwear with grip and treat slippery stones like they’re smarter than you.
You can also read our reviews of more hiking tours in Cebu City
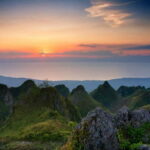
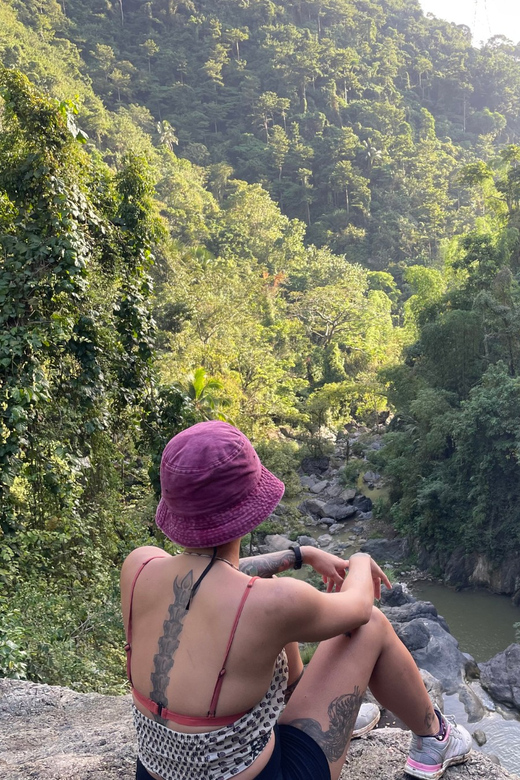
Mt. Kang-irag Campsite, Sirao: Break, Photos, and Sunset Views
Next comes the main work: up to Mt. Kang-irag Campsite, in Sirao. You’ll spend about 2 hours there.
This segment is where you earn the day’s headline moment: a 180-degree panoramic view over Cebu. There’s also time for:
- a break
- photo stops
- guided sightseeing
- sunset
In one guide-led experience, the group also enjoyed an ice-cold beer during the sunset calm. I’m not saying you need a beverage to make the view better. But if your guide allows a pause long enough to watch the light change over the city, that small reward feels very earned.
Also, guides like Christian and Jay were described as conversational—so if you like understanding what you’re seeing while you sweat, this is a good setup. You’re not just working your way up. You’re learning how locals talk about the area and its routes.
Busay Walk + Scooter to the Finish
After the campsite, you’ll move toward Busay with a short 20-minute walk, then take another scooter transfer for about 20 minutes.
Finally, you end at JY Square Mall. That ending spot is nice because you can step out of hiking mode into food, drinks, and normal city life without needing yet another long transport leg.
The Real Difficulty Level: Who Should Go (and Who Should Not)
This hike is labeled as tailored to your pace, but the route still has a hard truth: parts of Mt. Kang-irag aren’t gentle. It’s steep, and some sections require bouldering/scrambling. The activity also explicitly says it’s not recommended for complete beginners.
So how should you judge your own fitness?
You’re likely to enjoy it if you:
- can handle steep stairs or uphill paths for short periods
- don’t mind using hands for balance on rock steps
- have basic agility and steady footwork
You should think twice if you:
- have vertigo or are nervous on heights
- struggle with scrambling moves
- don’t have solid grip shoes
And it’s not suitable for pregnant women, wheelchair users, people with vertigo, visually impaired people, or people over 80. Even if you’re stubborn enough to try, the route design doesn’t match those needs.
Getting the Most Out of Guides Like Chris, Christian, and Jay
What stands out in the experiences people described is how much the guides cared about making the day both safe and enjoyable.
Chris and Christian were highlighted as:
- fun and helpful
- experienced with multiple routes
- willing to adapt to ability
Jay was described as friendly and supportive, with a hike that felt manageable even with some rock climbing, as long as you wear the right shoes and you’re not afraid of steep routes.
That adaptation matters more than people think. A guide who knows alternate lines and how to read the group can turn a tough scramble into a controlled, confidence-building step. A guide who treats everyone the same can make the hike feel harsher than it needs to.
One word of advice: if you’re less confident on rock steps, say so early. Guides can’t adjust what they don’t know.
Value Check: Is $52 Worth It for a City Mountain Adventure?
At $52 per person for about 5 hours, this tour has strong value because it bundles the whole package:
- local guiding through waterfalls and a steep ascent
- safety briefing
- transfers by scooter around the Cebu City area
- a payoff view that’s hard to recreate on your own without extra time and planning
It’s also good value in practical terms. You’re not spending hours figuring out transportation, where the trail starts, or how to time the best viewpoint. You’re paying for a clean plan and a local who can keep you moving on the route.
The only value warning: there can be occasional hiccups. One participant reported a long wait because the booking wasn’t initially recorded, then a replacement guide arrived after delays. That’s not common-sounding, but it’s a reminder to build a little flexibility into your schedule.
What to Bring (So You Don’t Regret It at Step 1)
This is one of those tours where your backpack choices affect your mood all day. The essentials are simple:
- Comfortable shoes (and ideally hiking shoes with grip)
- Water
- Cash
- Camera
If you have them, add:
- a light layer for the cooler higher sections
- something to keep your phone dry if you’re near water
Skip anything that makes you overconfident. Flip-flops look fine until you hit uneven rock and steep steps. And if you’re thinking about the optional swim, pack like you’ll get wet—then plan to keep moving carefully afterward.
Timing Tips: When to Go and How to Plan Your Morning
You’ll typically want a morning start so you can reach the campsite and have time for sunset viewing. Since your total time is around 5 hours, you’re not looking at a half-day that steals your entire afternoon.
If you’re staying in Cebu City, this kind of tour is a smart use of time. It scratches the hiking itch without turning into a multi-day trip or a full-day travel mission.
Also, give yourself a little buffer around the pickup point at Gaisano Grand. Being early reduces stress, and stress is the last thing you want before steep trail segments.
Who Should Book This Hike in Cebu City?
Book it if you want:
- a real workout with a view payoff
- waterfalls + river rocks + a steep climb in one compact plan
- guides who can explain the area and adjust the pace
It’s especially suited to active visitors staying around Cebu City who want something beyond beach time. If you enjoy hands-on hiking, short scrambles, and photo stops that actually matter, you’ll probably have a great time.
Skip it if you need:
- a fully flat route
- a no-scramble experience
- strong accessibility accommodations (the tour states it’s not suitable for wheelchair users, and it lists other medical limitations)
Should You Book Mt. Kang-irag + Budlaan Falls?
If you’re comfortable with steep terrain and you’re okay with some rock scrambling, I think this is an excellent choice. For $52, you get a guided day that starts in normal city space and ends with a wide viewpoint over Cebu—plus a waterfall break that can include optional swimming.
If you’re a true beginner, or if heights make you tense, choose a gentler hike instead. This isn’t a trail you force with optimism. It’s a trail you enjoy with the right mindset, good shoes, and a guide who matches your pace.
FAQ
FAQ
How long is the Cebu Adventure Hiking Trip?
The duration is 5 hours.
Where is the meeting point?
Meet at Jollibee inside Gaisano Grand – Talamban. Coordinates are 10.36601448059082, 123.91373443603516.
What does the itinerary include?
It includes a scooter transfer to the Budlaan area, a safety briefing, time at Budlaan Falls, the climb up Mt. Kang-irag to Kang-irag Campsite in Sirao, then a Busay walk and scooter transfer to finish at JY Square Mall.
Is swimming included?
Swimming is optional during the Budlaan Falls stop, where you may be able to swim in the cool, clear waters.
Is this hike suitable for beginners?
It is not recommended for complete beginners. The trail has steep sections and may require bouldering and scrambling.
What languages are the guides?
Guides speak English and Tagalog.
What should I bring?
Bring comfortable shoes or hiking shoes, water, a camera, and cash.
Who should not join this activity?
It is not suitable for pregnant women, wheelchair users, people with vertigo, visually impaired people, and people over 80 years old.
What about cancellation or paying later?
You can cancel up to 24 hours in advance for a full refund. You can also reserve now & pay later.